Prized for their distinctively sweet flavor, clams are a part of many traditions, especially here in the Northeast. This American institution of enjoying clams, needless to say, began with American Indians reaping their rewards from the mud flats that dot every sea and ocean encroached shoreline.

There is no set way of steaming clams, with each region here in the U.S. having their favorite method. But one should not overcook them. This makes them very rubbery and not very appetizing to enjoy.
Believe it or not, hard-shell clams and soft-shell clams are unrelated. Here in New England, our favorite clam would have to be the Steamer, which is a small, soft-shell clam and is harvested and served up and down the East coast. They are so called Steamers because of how they are most often prepared and enjoyed.
Another favorite among us Yankees are the hard-shell clams(more about the differences below) that are most often called Quahogs. Quahogs(pronounced ko-hogs)come in 3 general sizes, with each having their own derivation:
Small quahogs are littlenecks, medium are topnecks and the larger variety are referred to as cherrystone clams.
You often hear of clams having to be completely closed tight before cooking. This is not true for all clams. When cooking soft shell clams, such as the steamer, they are mostly slightly open, although there is a thin membrane that is covering this opening. Simply squeeze the clam lightly. Look carefully, if it moves its' neck inward toward the shell(if the neck is present) then it is alive. If it doesn't have a neck but you find that the steamer starts to shut its shell closer together, then it is alive as well. These clams are perfectly acceptable to cook and eat.
With hard-shell clams, the shells do need to be closed tightly to affirm whether or not they are alive enough to cook and eat. Throw out any dead clams whatsoever, regardless of its' species or variety. Even cracked or broken shells should warn you that something is wrong, therefore discarding them is the appropriate thing to do.
Next to the ever popular Clam Bake here in New England, simply water steamed clams are the essential element in every tourists culinary "must haves" when visiting. Although melted butter is the perfect accompaniment, many chefs(me included) have opted to spice things up a bit when steaming clams. Adding lemon juice, beer, garlic, onions, wine and various seasonings gives the diner a great flavor combination. Just remember that clams are a delicate lot, so subtlety is key when adding add-ins. I personally think lemon juice is far too strong to add to clams, even fried, but many swear by it.
Although its popularity is decreasing over the years, some say regulations while others contend that the harvest is declining, clamming has been a way of life and a great past time for many generations. The prerequisite for digging for clams, the clam hoe, resembles a long handled garden hoe, but with short, pitch-fork like tines and is used extensively by those who want to gain the greatest yield of clams for selling. And don't forget the wire mesh bucket and waders, the latter because of the softness of the mud "beaches" where you will find those breathing holes for the clams. You may need to wade in some water as well, making sure that low tide or the early stages of an incoming tide are present when you are ready for clamming.
Often times, clams will simply be laying there on the top of the sand. In that case, just reach down and pick them up. But more often than not, you will have to dig a hole with your hoe, or your hands(being very careful and wearing gloves) about a foot down. The edges of a clam are sharp, so wear gloves. Gently dig down until you see the first sign of a clam and gently, without breaking the shell, lift these glorious bits up, throw in your mesh basket and continue. Make sure you take this basket to the water and rinse well when finished harvesting.
Remember that most cities and towns have regulations regarding clamming, although you are sure to get a one day pass for just a few dollars. Your limit will vary from region to region, but always enough to make a great feed.
Now for the cleaning, cooking and eating fun.The directions are the same for all clams, either hand dug yourself or store-boughten (Yeah, that's how us Yankee's talk) .You will need to clean them thoroughly and try to rid the clam of any wayward sand in its' belly. Most clams will release the sand and mud in their stomachs if you let them stand for about a half hour in some sea water or salted water(using 1/3 cup salt mixed into a gallon of tap water). Never use regular tap water or unsalted, this will kill them!
Change water and repeat the soaking 2-3 times. Never mind the "tips and tricks" some use, like corn meal or other ludicrous ways.
Most of the time, when purchasing clams in a supermarket of other purveyor of seafood, the clams have purged just about as much sand as they are going to, so this step is somewhat unnecessary.
Make sure you scrub the clams with a stiff brush if you dug them yourself. If not, go ahead and check to make sure all the clams you are about to cook are alive(as referred to above). Discard any dead ones.
If you really want to remove a clam from its shell while it is alive, all you need to do is insert a strong, thin knife between the shell halves near the thick end and run it around between the shell halves. Try not to hit any of the clam meat and make sure you do this over a bowl, the nectar of the clams will trickle out and is great for many recipes. Soft shell clams are the easiest, along with long neck and geoduck, because they do not have very tight-fitting shells.
Once you have separated the two shell halves, run the knife gently under the very tough muscle that is located near the siphon to make sure there is no part of the clam still attached. There is nothing worse looking than a mangled, fresh clam. Use these raw clams as directed in your recipe. Clams on the halfshell are great as well. Just rinse off the detached shell and clam meat, replace the clam back onto one half of the shell, drizzle with a dab of lemon juice and eat as you would a fresh oyster.
Another great way to cook clams in their shell is by simply placing them on a baking sheet then on your grill, close the lid and cook over medium heat until they all open, about 5-7 minutes later.
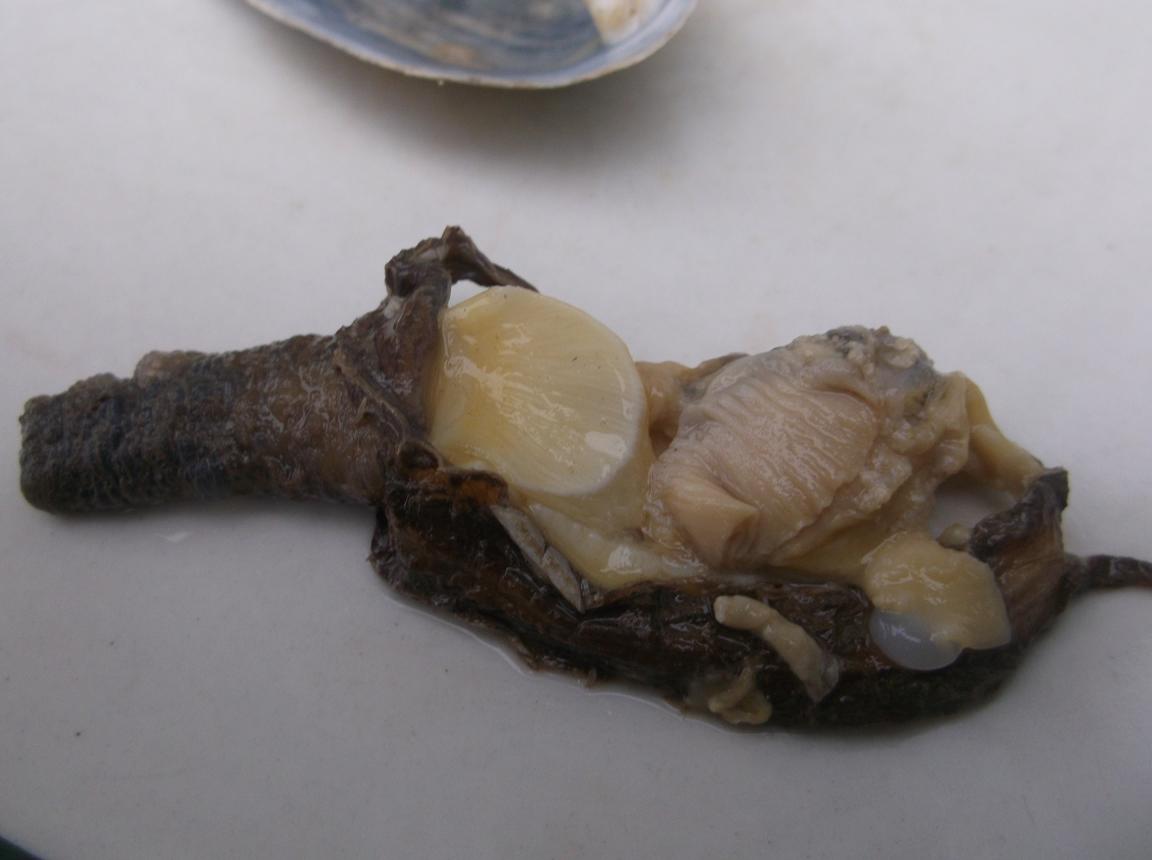
Enjoying Steamers is quite another thing entirely. Some people will steam their clams, pull the meat from the shell and "dip to dine". Although a delight, I find the black "sheath" that covers the siphon to be a little too chewy for me, so I slip it off simply by holding the cooked clam belly in my right hand and gently pulling this sheath off with my left. It removes quite easily and now can be enjoyed to its fullest.


When you go to any restaurant to try steamers, you will always be served with an empty basket(to throw your discarded shells into), a side of melted butter(sometimes ghee or clarified butter) and a bowl of some brackish looking water. This water is the same water that the steamers were cooked in and is used to rinse off any sand or shell particles that may cling to a clam. You dip it into the water, then butter then drag a trail of butter and juice from your shirt, passed your chin and lips and into your moth. Now you know why a bib is required.
Yankee Steamed Clams
Although I am very fond of simple steamed clams, I adore the flavor of garlic and shallot mingled with the briny mollusk. The vegetable broth, as well, lends itself perfectly without overpowering these sweet bi-valves. With a torn off piece of crusty bread to soak up any remaining juice at the bottom of the bowl is just a plus n my book!
2 pounds steamers
2 tablespoons butter
1 shallot, sliced
2 teaspoons garlic in oil
3/4 cup vegetable broth or clam juice*
Chopped fresh parsley, optional
In a large skillet over medium heat, melt the butter. When hot and sizzling, add the shallot and garlic. Cook about 2 minutes, stirring frequently. Add the clams and broth, cover and cook for about 8-10 minutes, or until the clams open up. do not over cook. Shake the skillet very frequently to baste the clams with the seasoned broth. Remove from heat, pour entire contents into a large bowl and enjoy with parsley sprinkled over the top.
*Clam juice is easily found in any supermarket in a small 6 ounce bottle.

There is no set way of steaming clams, with each region here in the U.S. having their favorite method. But one should not overcook them. This makes them very rubbery and not very appetizing to enjoy.
Believe it or not, hard-shell clams and soft-shell clams are unrelated. Here in New England, our favorite clam would have to be the Steamer, which is a small, soft-shell clam and is harvested and served up and down the East coast. They are so called Steamers because of how they are most often prepared and enjoyed.
Another favorite among us Yankees are the hard-shell clams(more about the differences below) that are most often called Quahogs. Quahogs(pronounced ko-hogs)come in 3 general sizes, with each having their own derivation:
Small quahogs are littlenecks, medium are topnecks and the larger variety are referred to as cherrystone clams.
You often hear of clams having to be completely closed tight before cooking. This is not true for all clams. When cooking soft shell clams, such as the steamer, they are mostly slightly open, although there is a thin membrane that is covering this opening. Simply squeeze the clam lightly. Look carefully, if it moves its' neck inward toward the shell(if the neck is present) then it is alive. If it doesn't have a neck but you find that the steamer starts to shut its shell closer together, then it is alive as well. These clams are perfectly acceptable to cook and eat.
With hard-shell clams, the shells do need to be closed tightly to affirm whether or not they are alive enough to cook and eat. Throw out any dead clams whatsoever, regardless of its' species or variety. Even cracked or broken shells should warn you that something is wrong, therefore discarding them is the appropriate thing to do.
Next to the ever popular Clam Bake here in New England, simply water steamed clams are the essential element in every tourists culinary "must haves" when visiting. Although melted butter is the perfect accompaniment, many chefs(me included) have opted to spice things up a bit when steaming clams. Adding lemon juice, beer, garlic, onions, wine and various seasonings gives the diner a great flavor combination. Just remember that clams are a delicate lot, so subtlety is key when adding add-ins. I personally think lemon juice is far too strong to add to clams, even fried, but many swear by it.
Although its popularity is decreasing over the years, some say regulations while others contend that the harvest is declining, clamming has been a way of life and a great past time for many generations. The prerequisite for digging for clams, the clam hoe, resembles a long handled garden hoe, but with short, pitch-fork like tines and is used extensively by those who want to gain the greatest yield of clams for selling. And don't forget the wire mesh bucket and waders, the latter because of the softness of the mud "beaches" where you will find those breathing holes for the clams. You may need to wade in some water as well, making sure that low tide or the early stages of an incoming tide are present when you are ready for clamming.
Often times, clams will simply be laying there on the top of the sand. In that case, just reach down and pick them up. But more often than not, you will have to dig a hole with your hoe, or your hands(being very careful and wearing gloves) about a foot down. The edges of a clam are sharp, so wear gloves. Gently dig down until you see the first sign of a clam and gently, without breaking the shell, lift these glorious bits up, throw in your mesh basket and continue. Make sure you take this basket to the water and rinse well when finished harvesting.
Remember that most cities and towns have regulations regarding clamming, although you are sure to get a one day pass for just a few dollars. Your limit will vary from region to region, but always enough to make a great feed.
Now for the cleaning, cooking and eating fun.The directions are the same for all clams, either hand dug yourself or store-boughten (Yeah, that's how us Yankee's talk) .You will need to clean them thoroughly and try to rid the clam of any wayward sand in its' belly. Most clams will release the sand and mud in their stomachs if you let them stand for about a half hour in some sea water or salted water(using 1/3 cup salt mixed into a gallon of tap water). Never use regular tap water or unsalted, this will kill them!
Change water and repeat the soaking 2-3 times. Never mind the "tips and tricks" some use, like corn meal or other ludicrous ways.
Most of the time, when purchasing clams in a supermarket of other purveyor of seafood, the clams have purged just about as much sand as they are going to, so this step is somewhat unnecessary.
Make sure you scrub the clams with a stiff brush if you dug them yourself. If not, go ahead and check to make sure all the clams you are about to cook are alive(as referred to above). Discard any dead ones.
If you really want to remove a clam from its shell while it is alive, all you need to do is insert a strong, thin knife between the shell halves near the thick end and run it around between the shell halves. Try not to hit any of the clam meat and make sure you do this over a bowl, the nectar of the clams will trickle out and is great for many recipes. Soft shell clams are the easiest, along with long neck and geoduck, because they do not have very tight-fitting shells.
Once you have separated the two shell halves, run the knife gently under the very tough muscle that is located near the siphon to make sure there is no part of the clam still attached. There is nothing worse looking than a mangled, fresh clam. Use these raw clams as directed in your recipe. Clams on the halfshell are great as well. Just rinse off the detached shell and clam meat, replace the clam back onto one half of the shell, drizzle with a dab of lemon juice and eat as you would a fresh oyster.
Another great way to cook clams in their shell is by simply placing them on a baking sheet then on your grill, close the lid and cook over medium heat until they all open, about 5-7 minutes later.
Enjoying Steamers is quite another thing entirely. Some people will steam their clams, pull the meat from the shell and "dip to dine". Although a delight, I find the black "sheath" that covers the siphon to be a little too chewy for me, so I slip it off simply by holding the cooked clam belly in my right hand and gently pulling this sheath off with my left. It removes quite easily and now can be enjoyed to its fullest.


When you go to any restaurant to try steamers, you will always be served with an empty basket(to throw your discarded shells into), a side of melted butter(sometimes ghee or clarified butter) and a bowl of some brackish looking water. This water is the same water that the steamers were cooked in and is used to rinse off any sand or shell particles that may cling to a clam. You dip it into the water, then butter then drag a trail of butter and juice from your shirt, passed your chin and lips and into your moth. Now you know why a bib is required.
Yankee Steamed Clams
Although I am very fond of simple steamed clams, I adore the flavor of garlic and shallot mingled with the briny mollusk. The vegetable broth, as well, lends itself perfectly without overpowering these sweet bi-valves. With a torn off piece of crusty bread to soak up any remaining juice at the bottom of the bowl is just a plus n my book!
2 pounds steamers
2 tablespoons butter
1 shallot, sliced
2 teaspoons garlic in oil
3/4 cup vegetable broth or clam juice*
Chopped fresh parsley, optional
In a large skillet over medium heat, melt the butter. When hot and sizzling, add the shallot and garlic. Cook about 2 minutes, stirring frequently. Add the clams and broth, cover and cook for about 8-10 minutes, or until the clams open up. do not over cook. Shake the skillet very frequently to baste the clams with the seasoned broth. Remove from heat, pour entire contents into a large bowl and enjoy with parsley sprinkled over the top.
*Clam juice is easily found in any supermarket in a small 6 ounce bottle.
No comments:
Post a Comment